Google Tag Manager
Google Tag Manager (GTM) allows you to add tracking scripts to your website without modifying your codebase directly. This guide walks you through integrating Swetrix via GTM.
GTM adds extra complexity and is blocked by many adblockers, which may reduce tracking reliability. The Swetrix tracking script is lightweight and we recommend adding it directly when possible. You can also set up a proxy to mitigate adblocker interference.
Why the snippet looks different
Normally you'd add Swetrix to your site with a simple <script> tag. However, GTM injects Custom HTML tags dynamically, which means the defer attribute on a script tag is ignored by browsers — the script loads asynchronously instead. To ensure Swetrix is fully loaded before we initialise it, we use a dynamic script element with an onload handler.
Installation
-
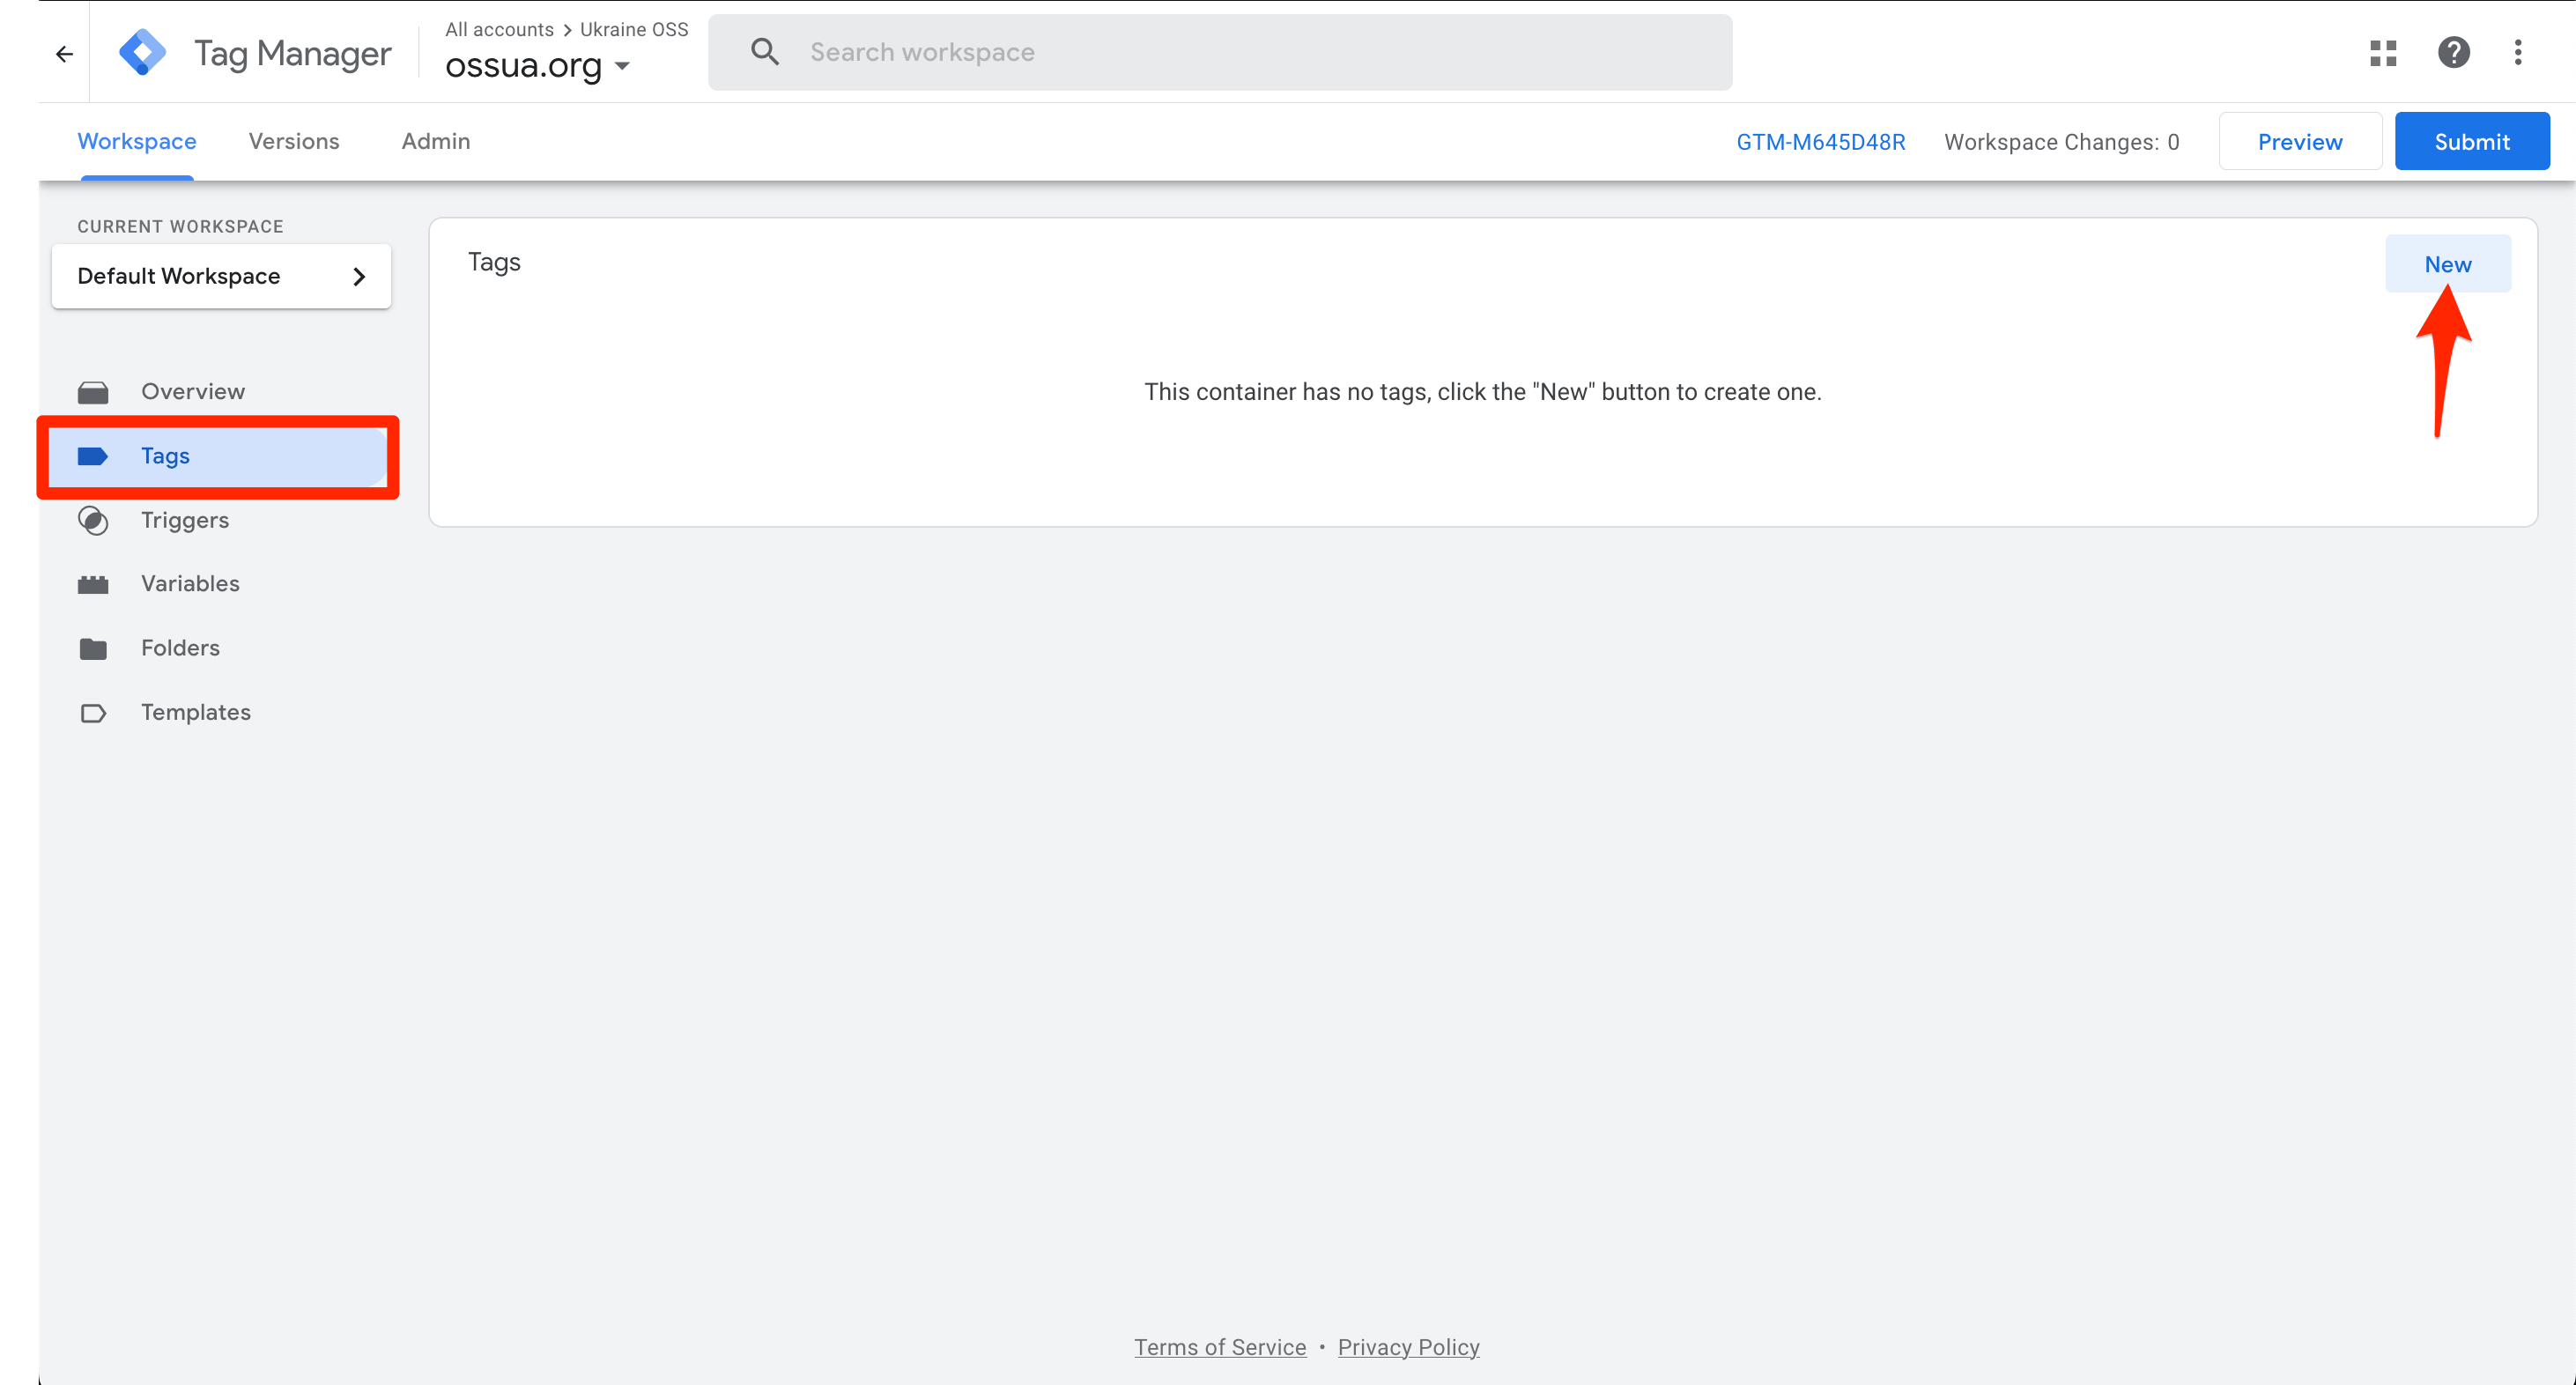
Sign in to your Google Tag Manager account, click on Tags and then New.
-
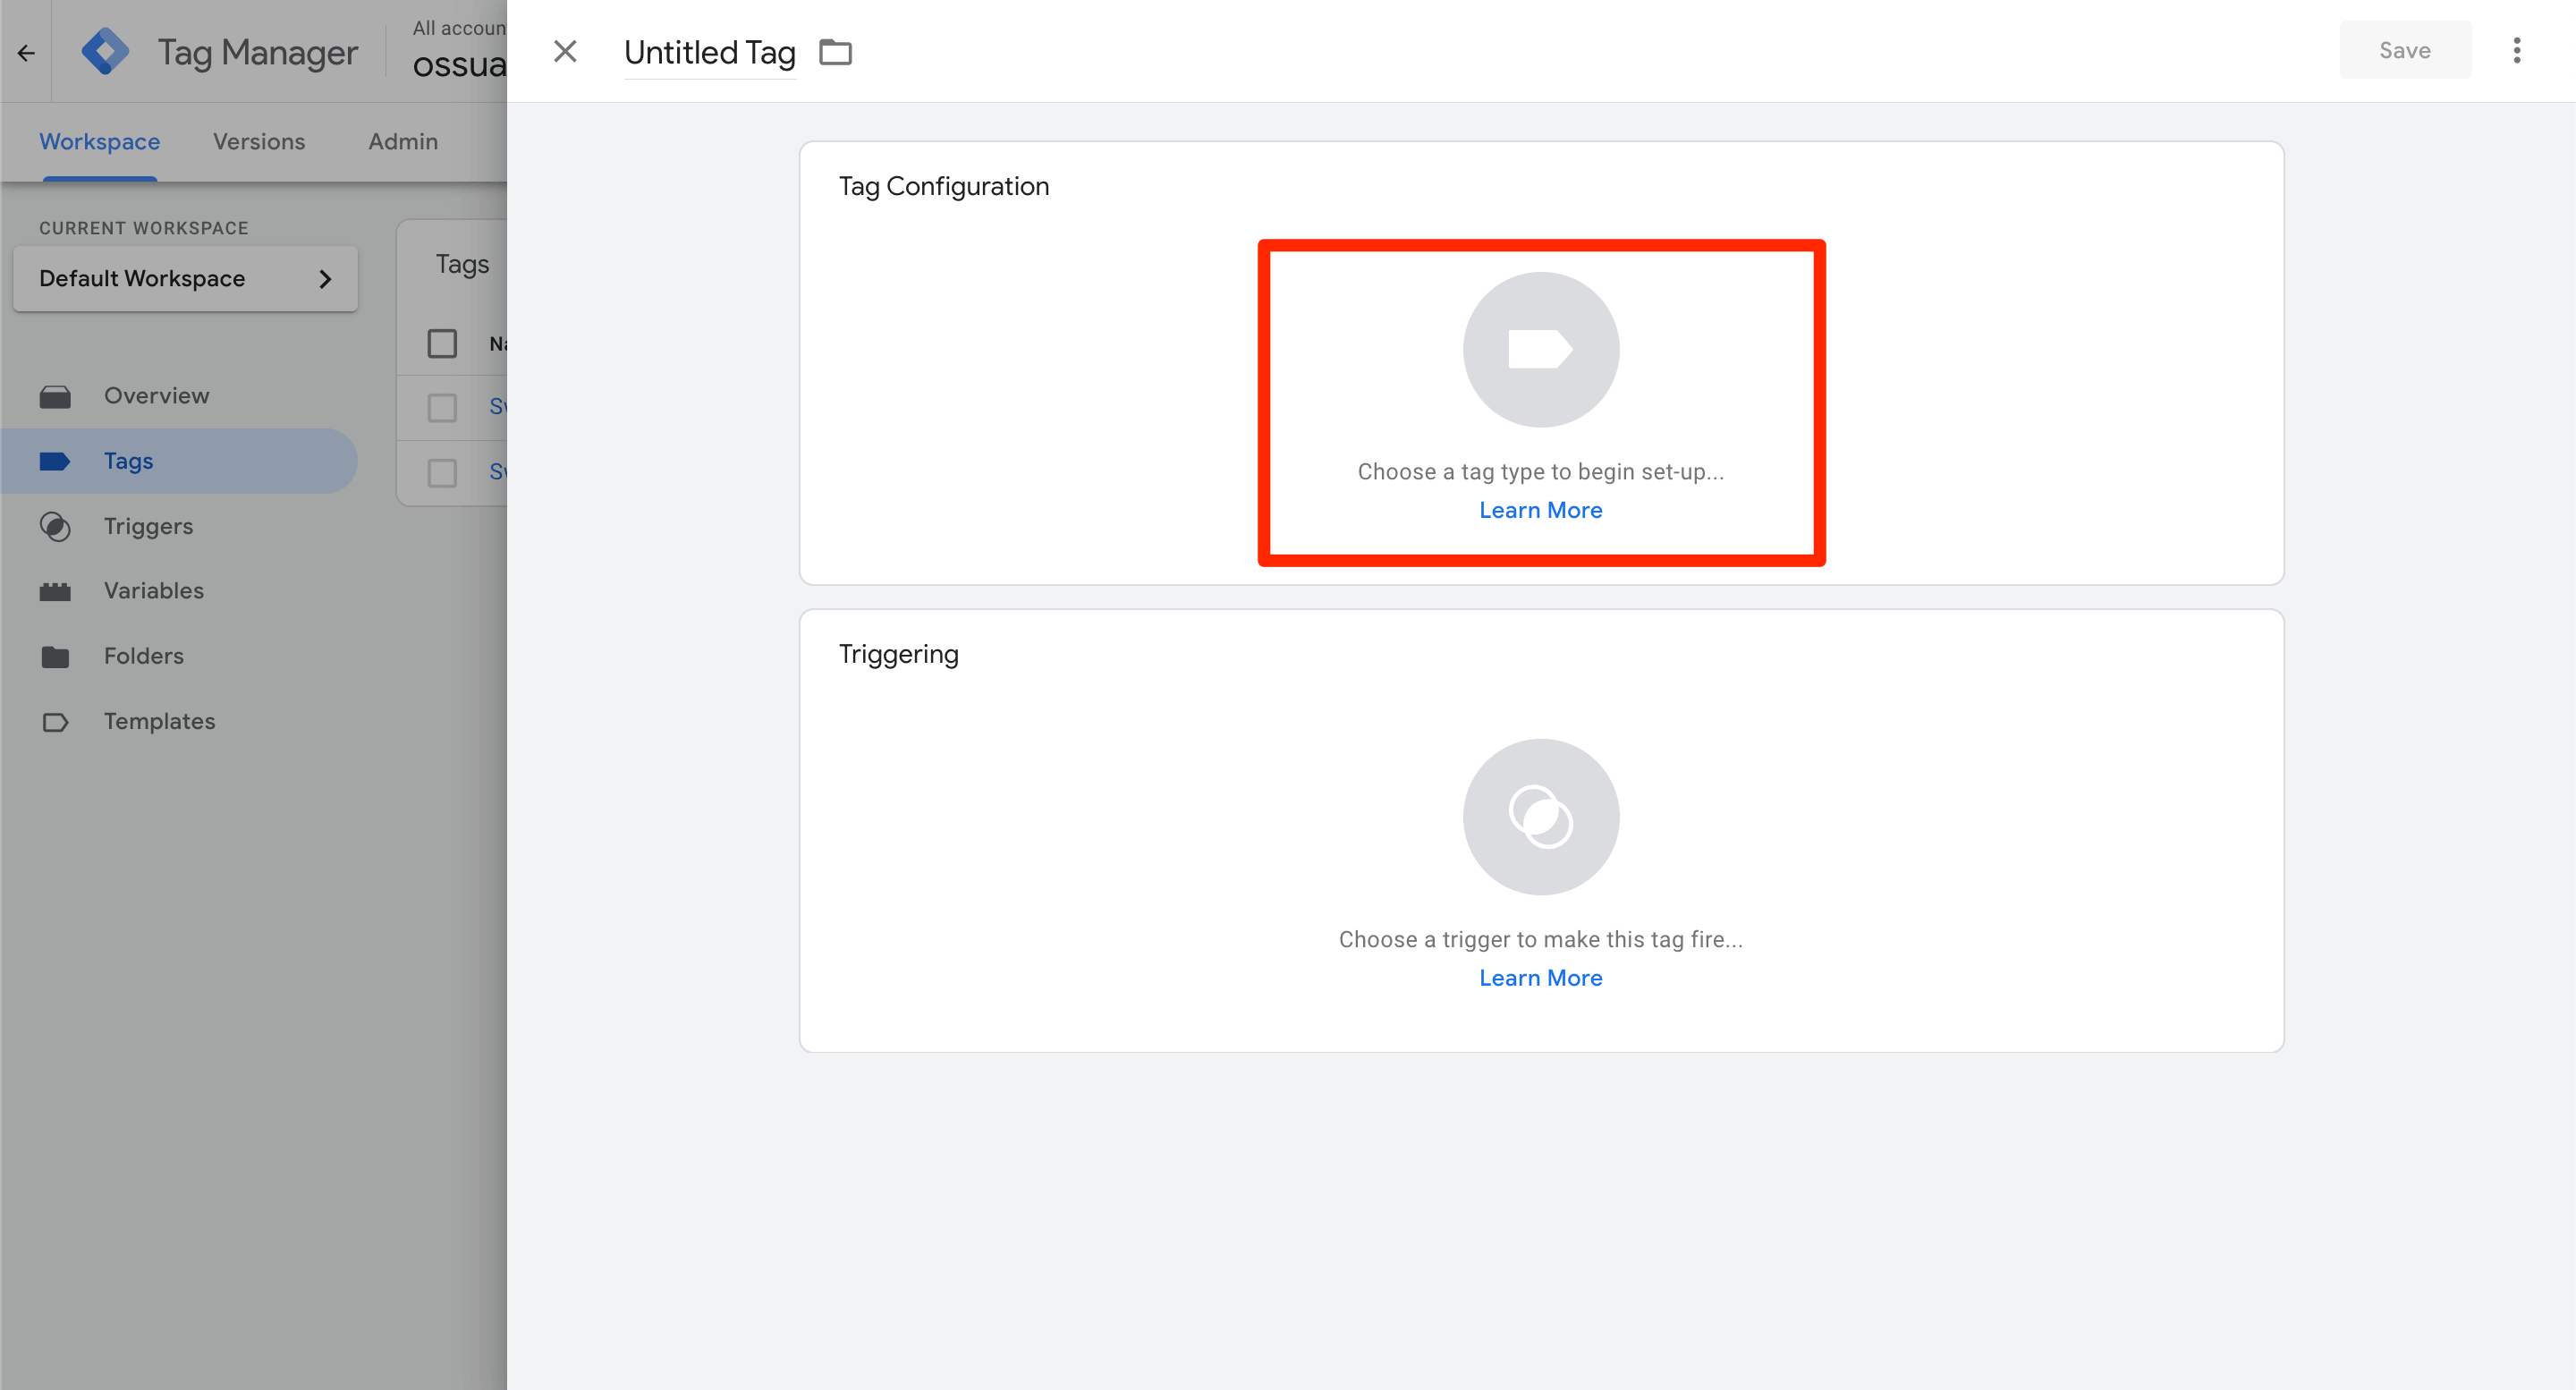
Under the Tag Configuration section, click on "Choose a tag type to begin set-up...".
-
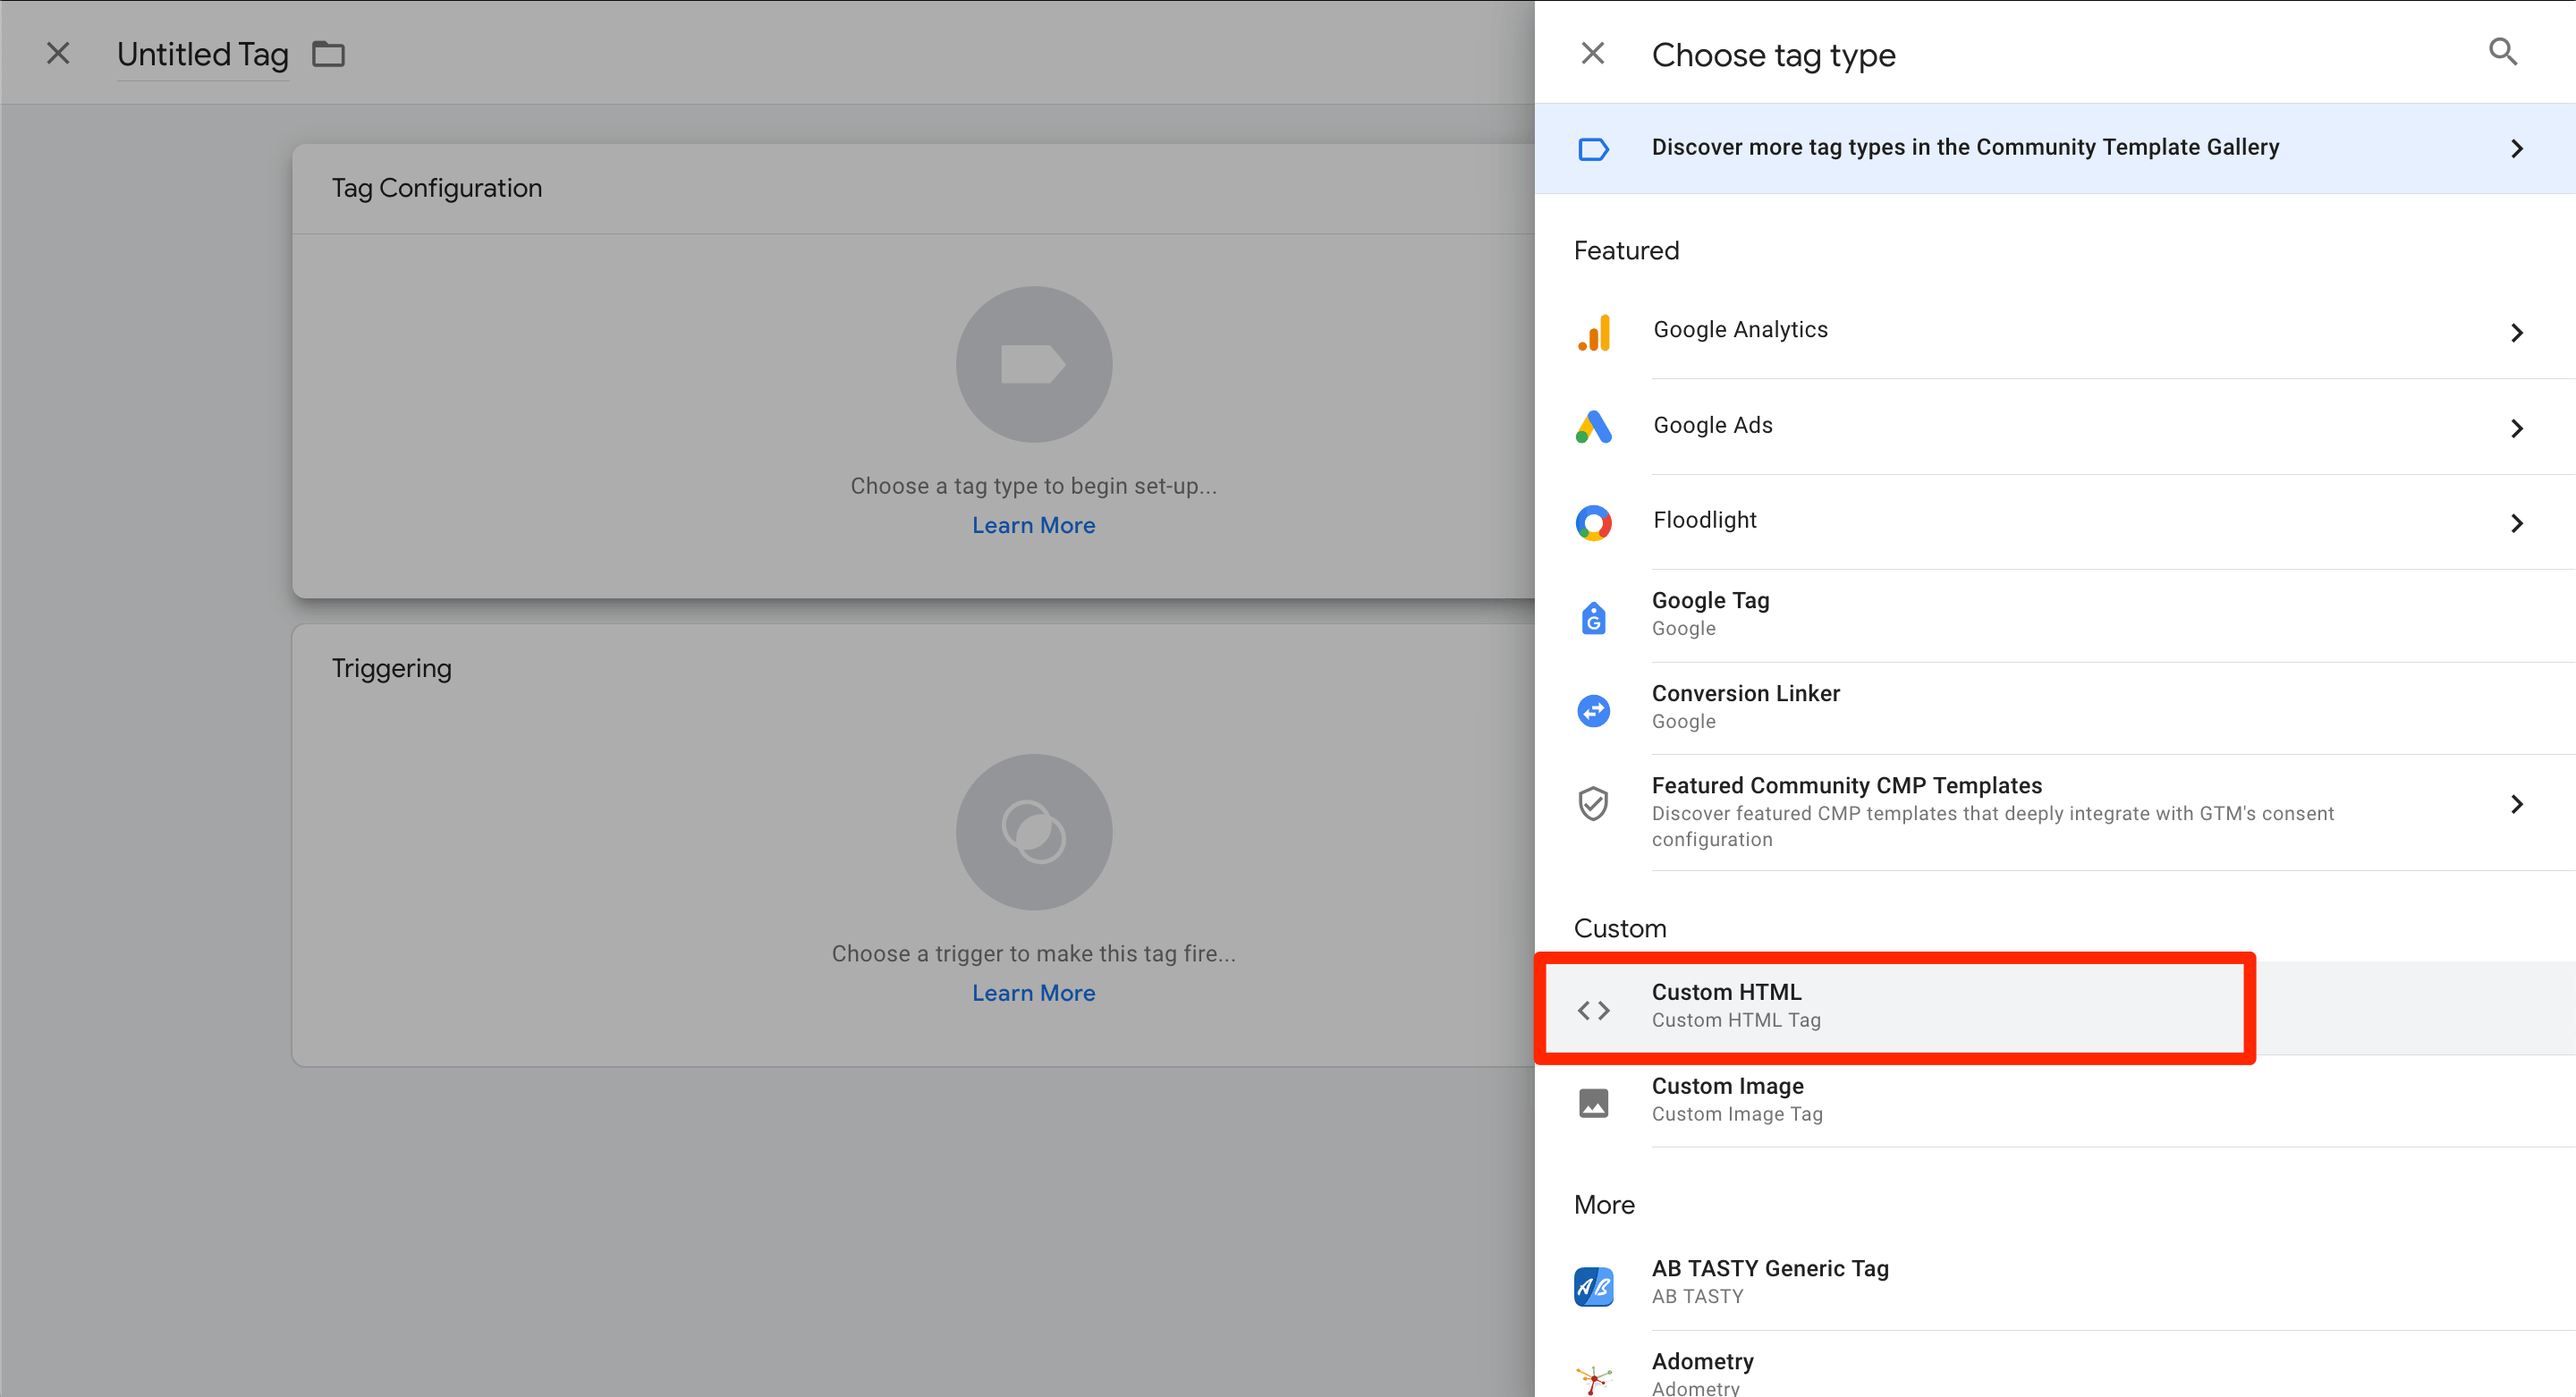
Select Custom HTML.
-
In the HTML input field, paste the following code:
<script>
  (function () {
    var el = document.createElement('script')
    el.src = 'https://swetrix.org/swetrix.js'
    el.onload = function () {
      swetrix.init('YOUR_PROJECT_ID')
      swetrix.trackViews()
    }
    document.head.appendChild(el)
  })()
</script>
Replace YOUR_PROJECT_ID with your actual Project ID from the Swetrix dashboard, otherwise tracking won't work.
You can also refer to the tracking script reference for more advanced configuration options (e.g. hash, search, respectDNT).
-
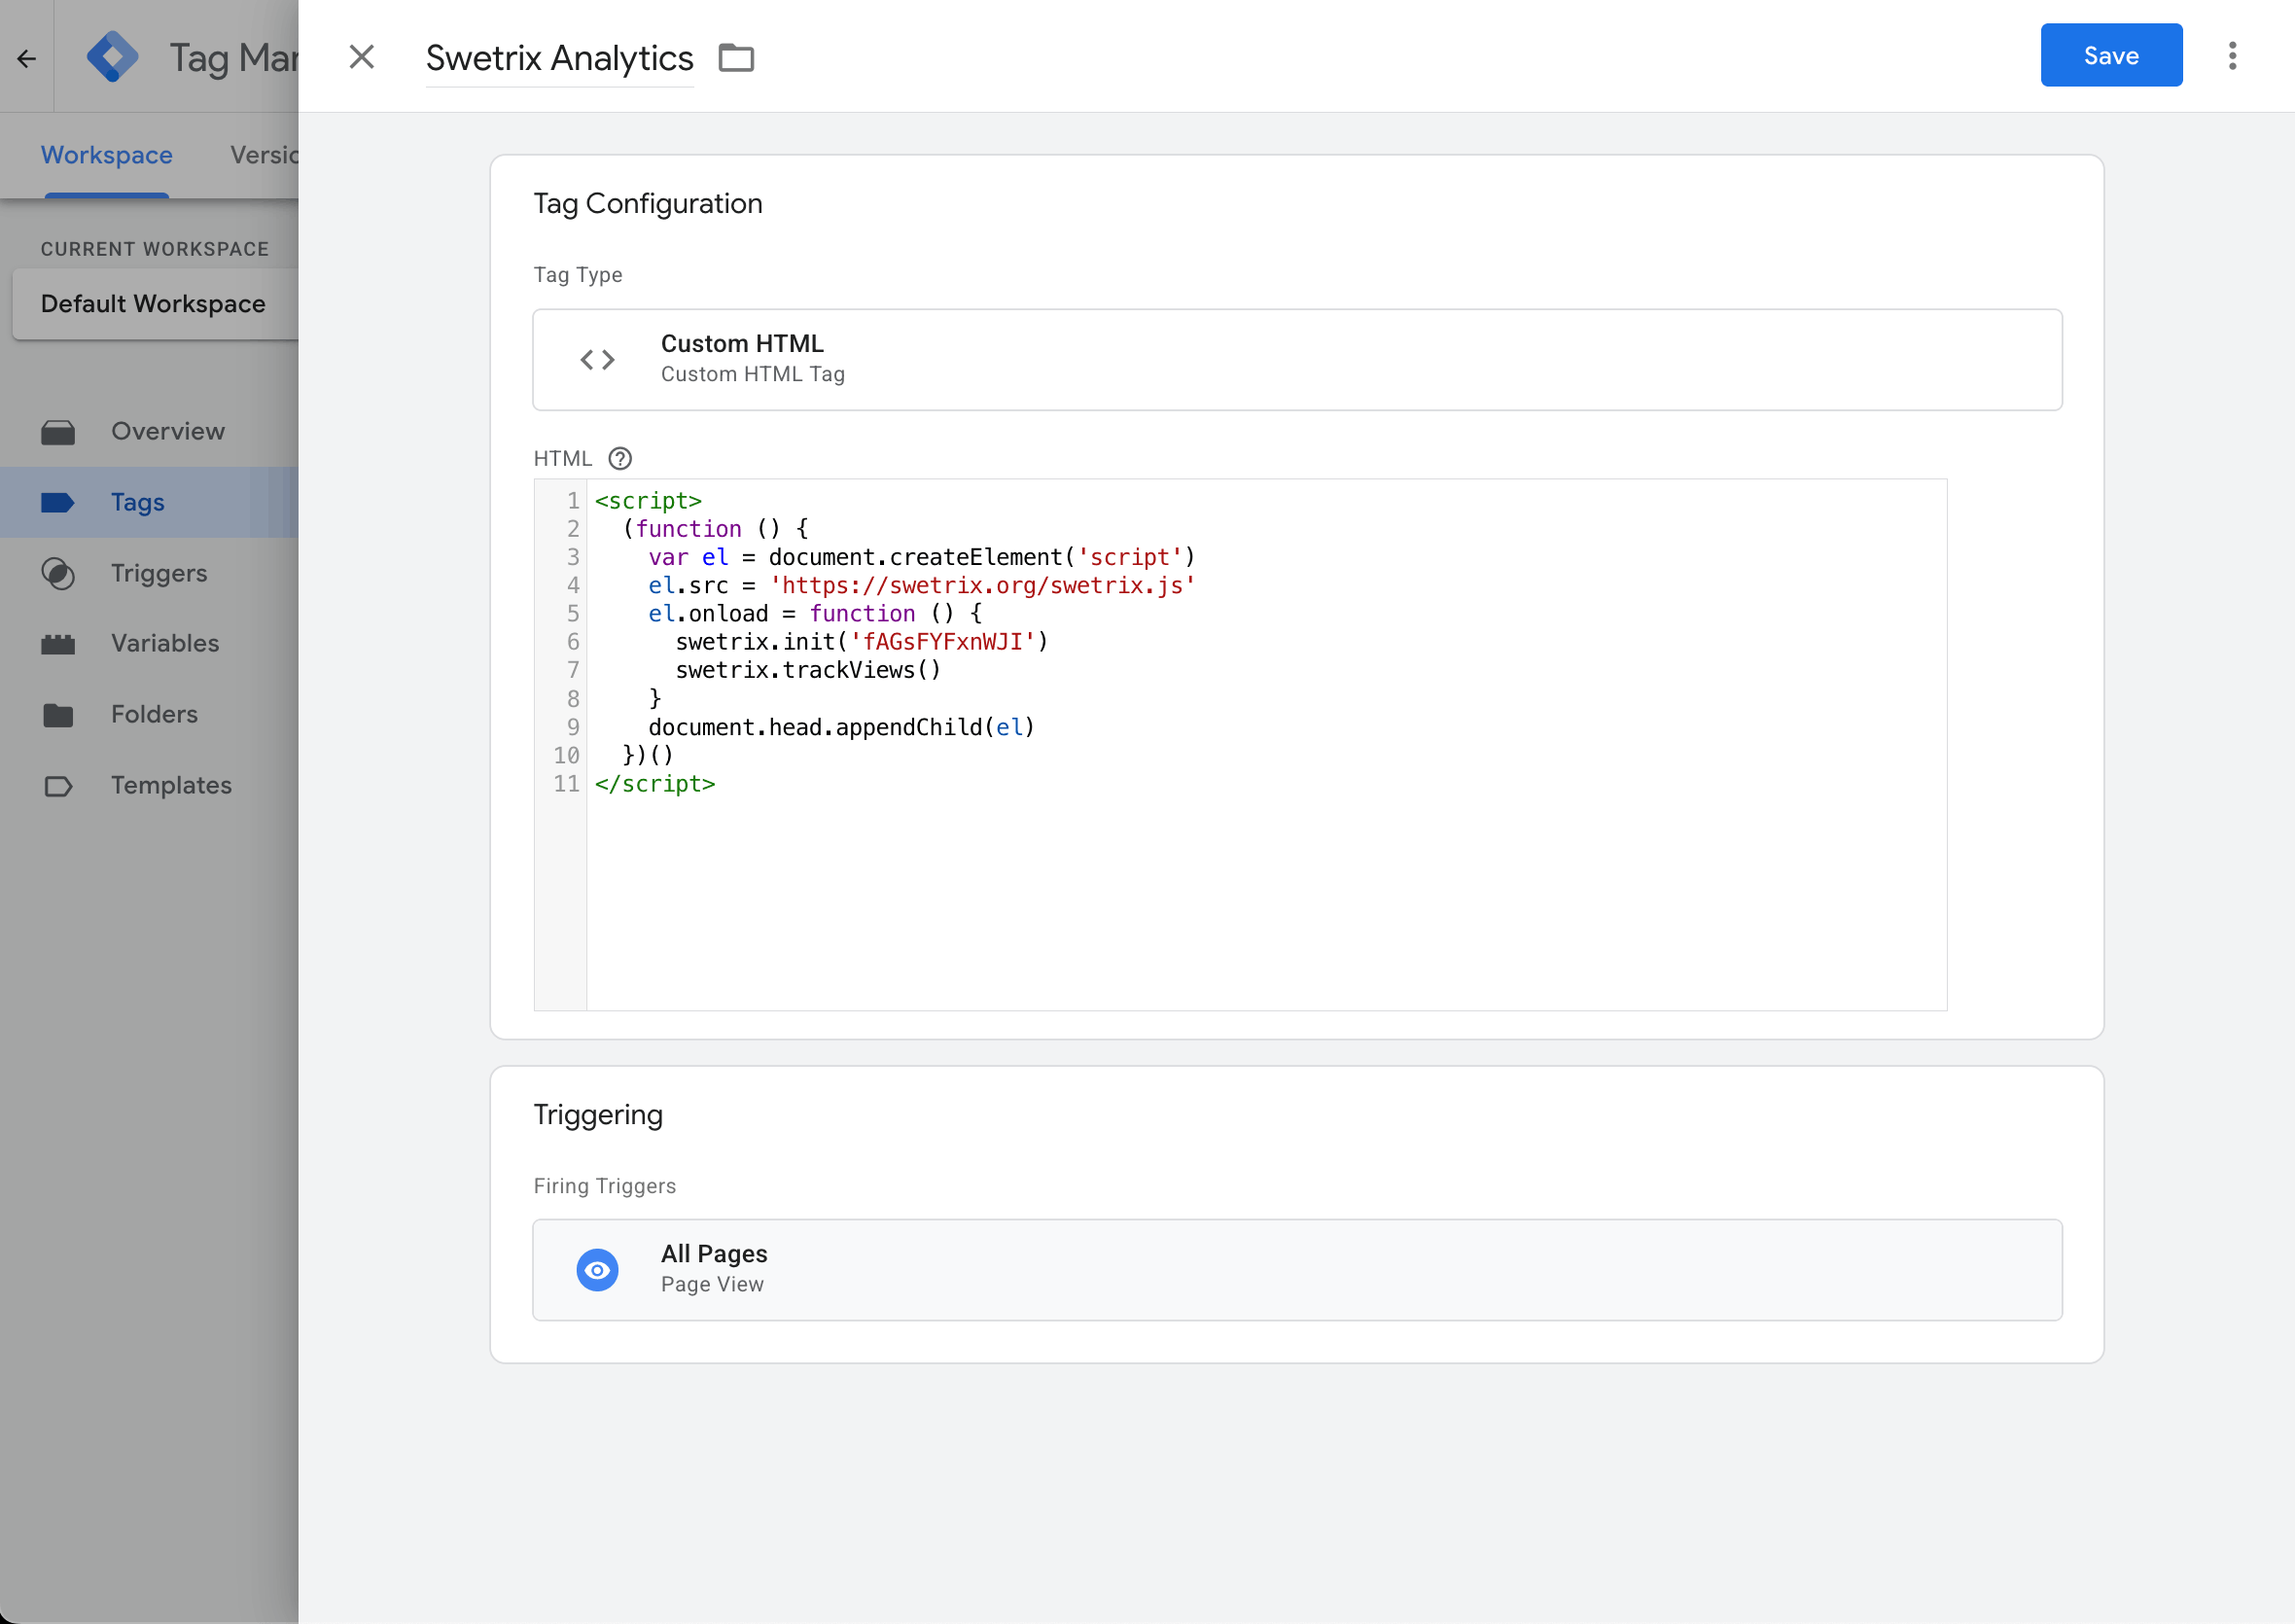
Under Triggering, click on "Choose a trigger to make this tag fire..." and select All Pages (or set up a more specific trigger to limit which pages Swetrix runs on).
-
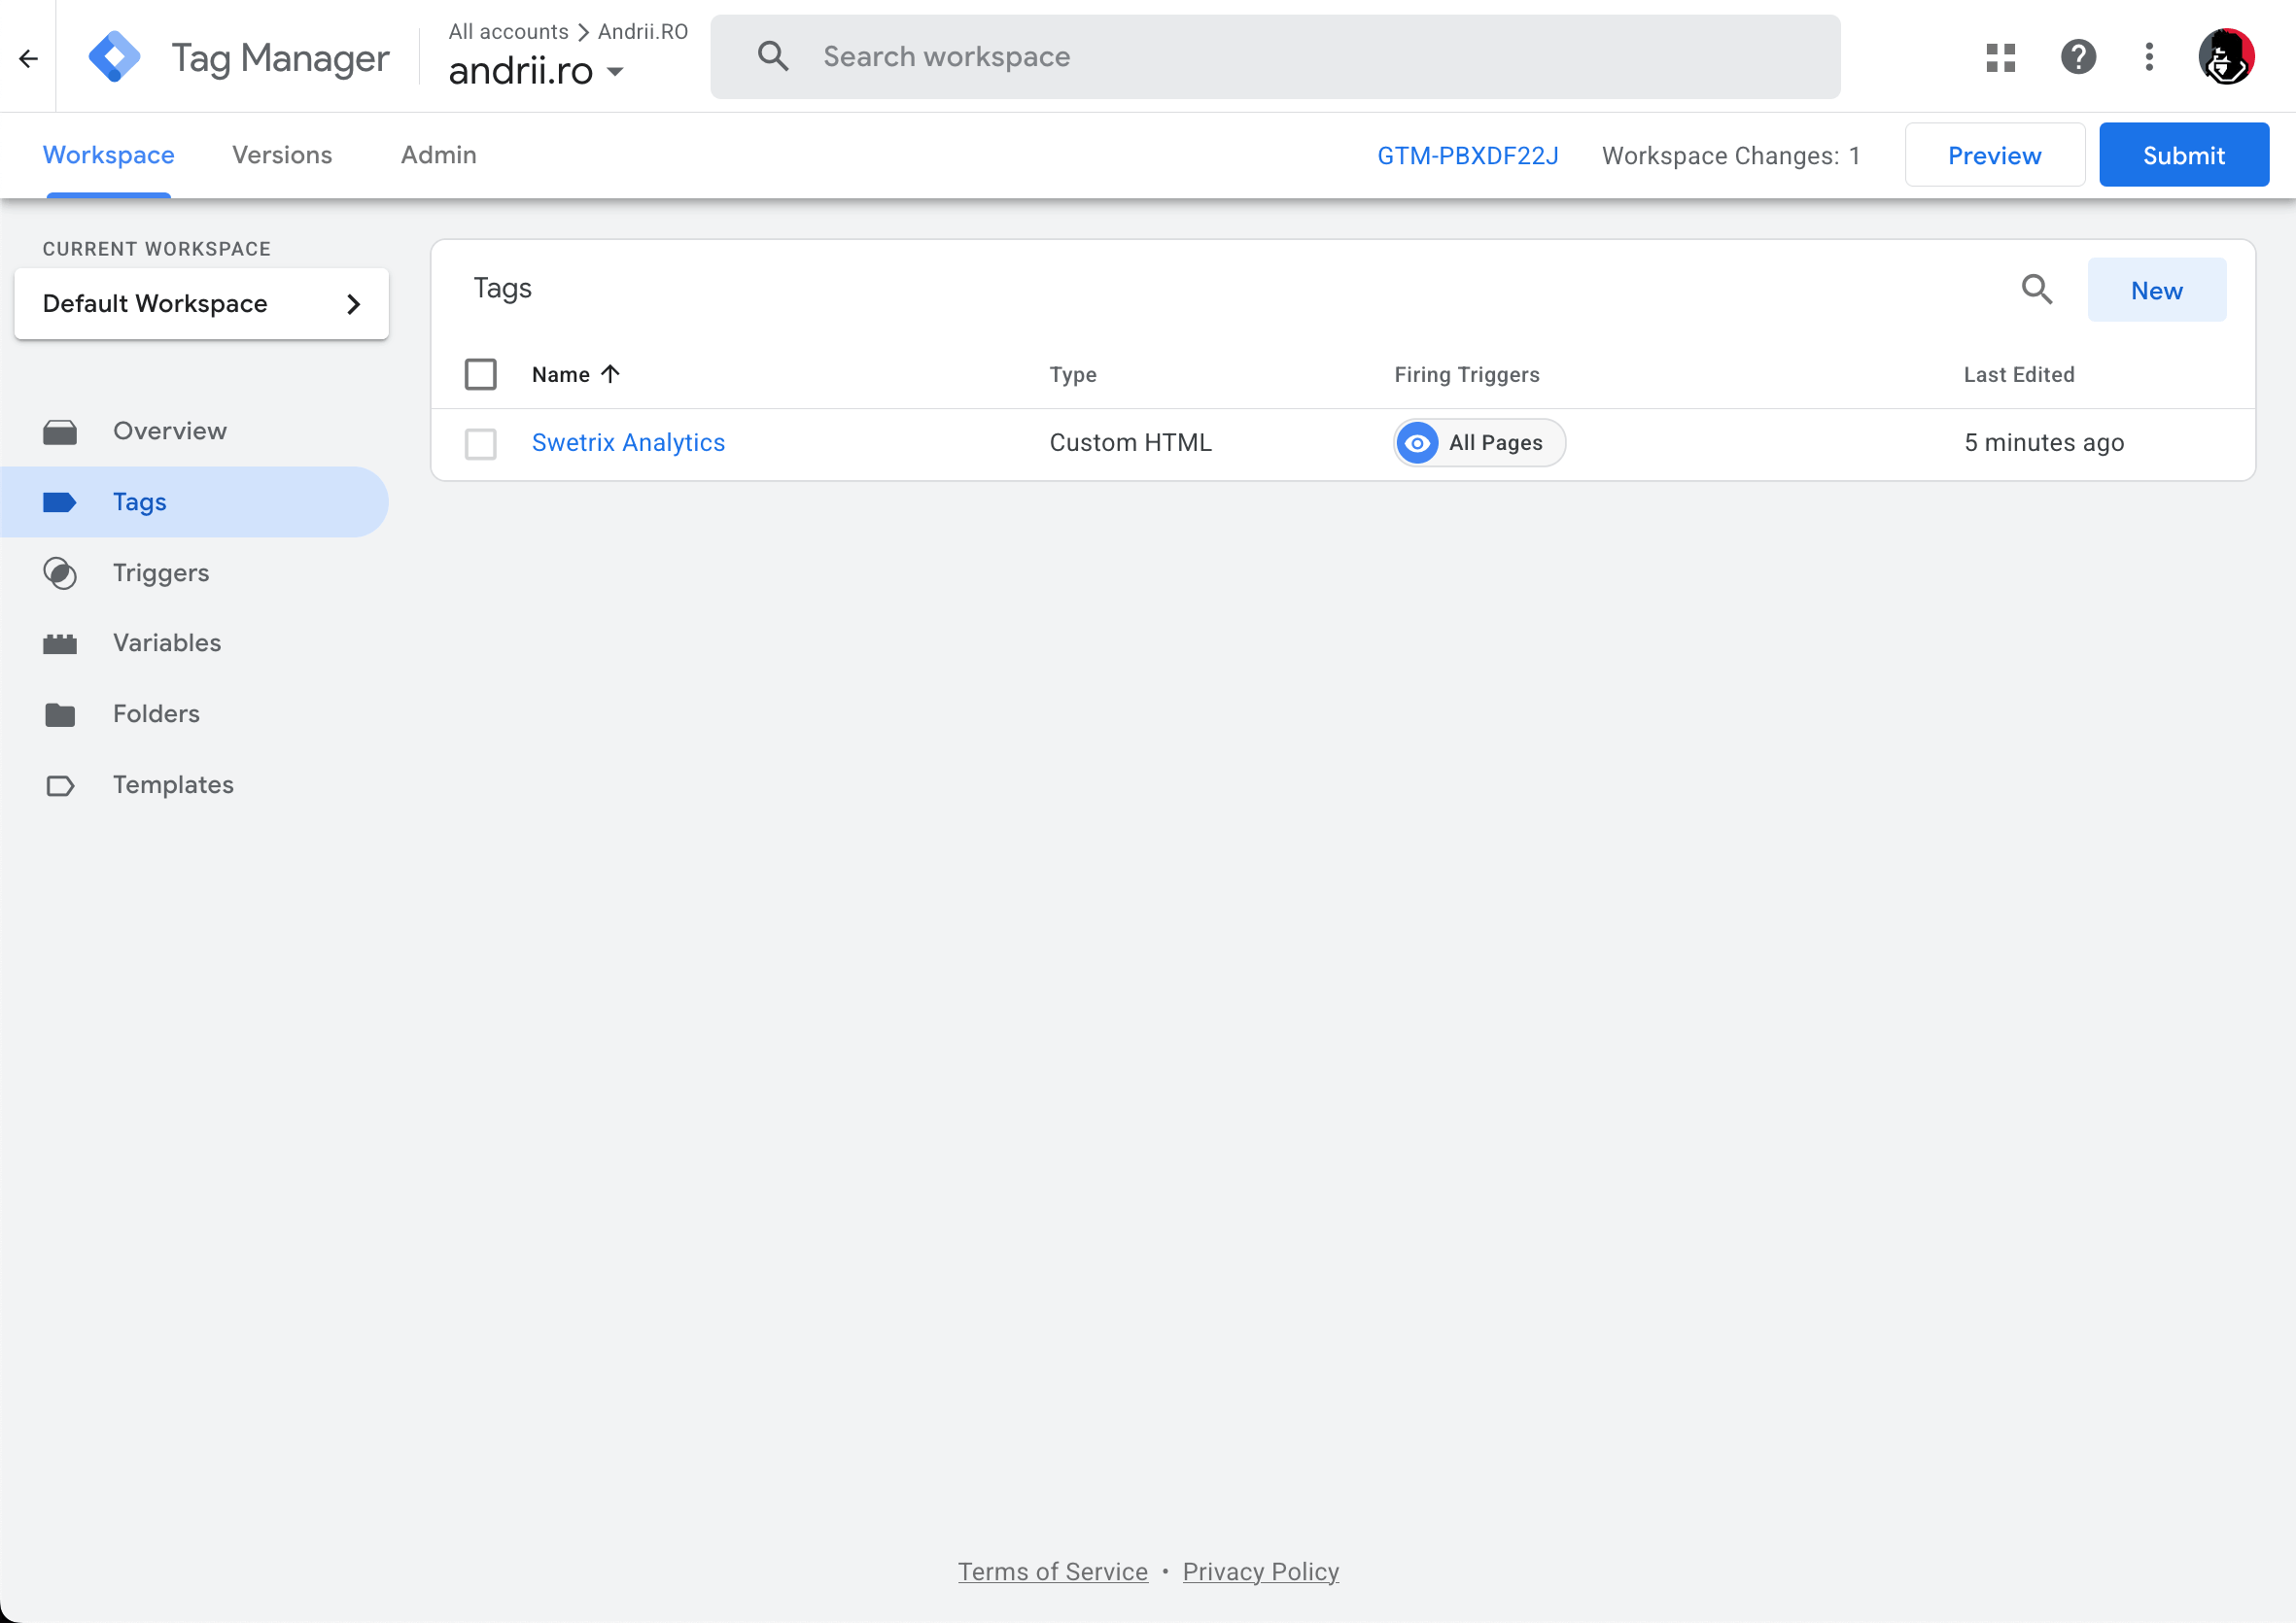
Give your tag a name — change "Untitled Tag" to something like Swetrix Analytics. The result should look similar to this:
-
Click Save. A list of tags will be displayed - you should see your new Swetrix tag in the list. Click the Submit button in the top right corner.
-
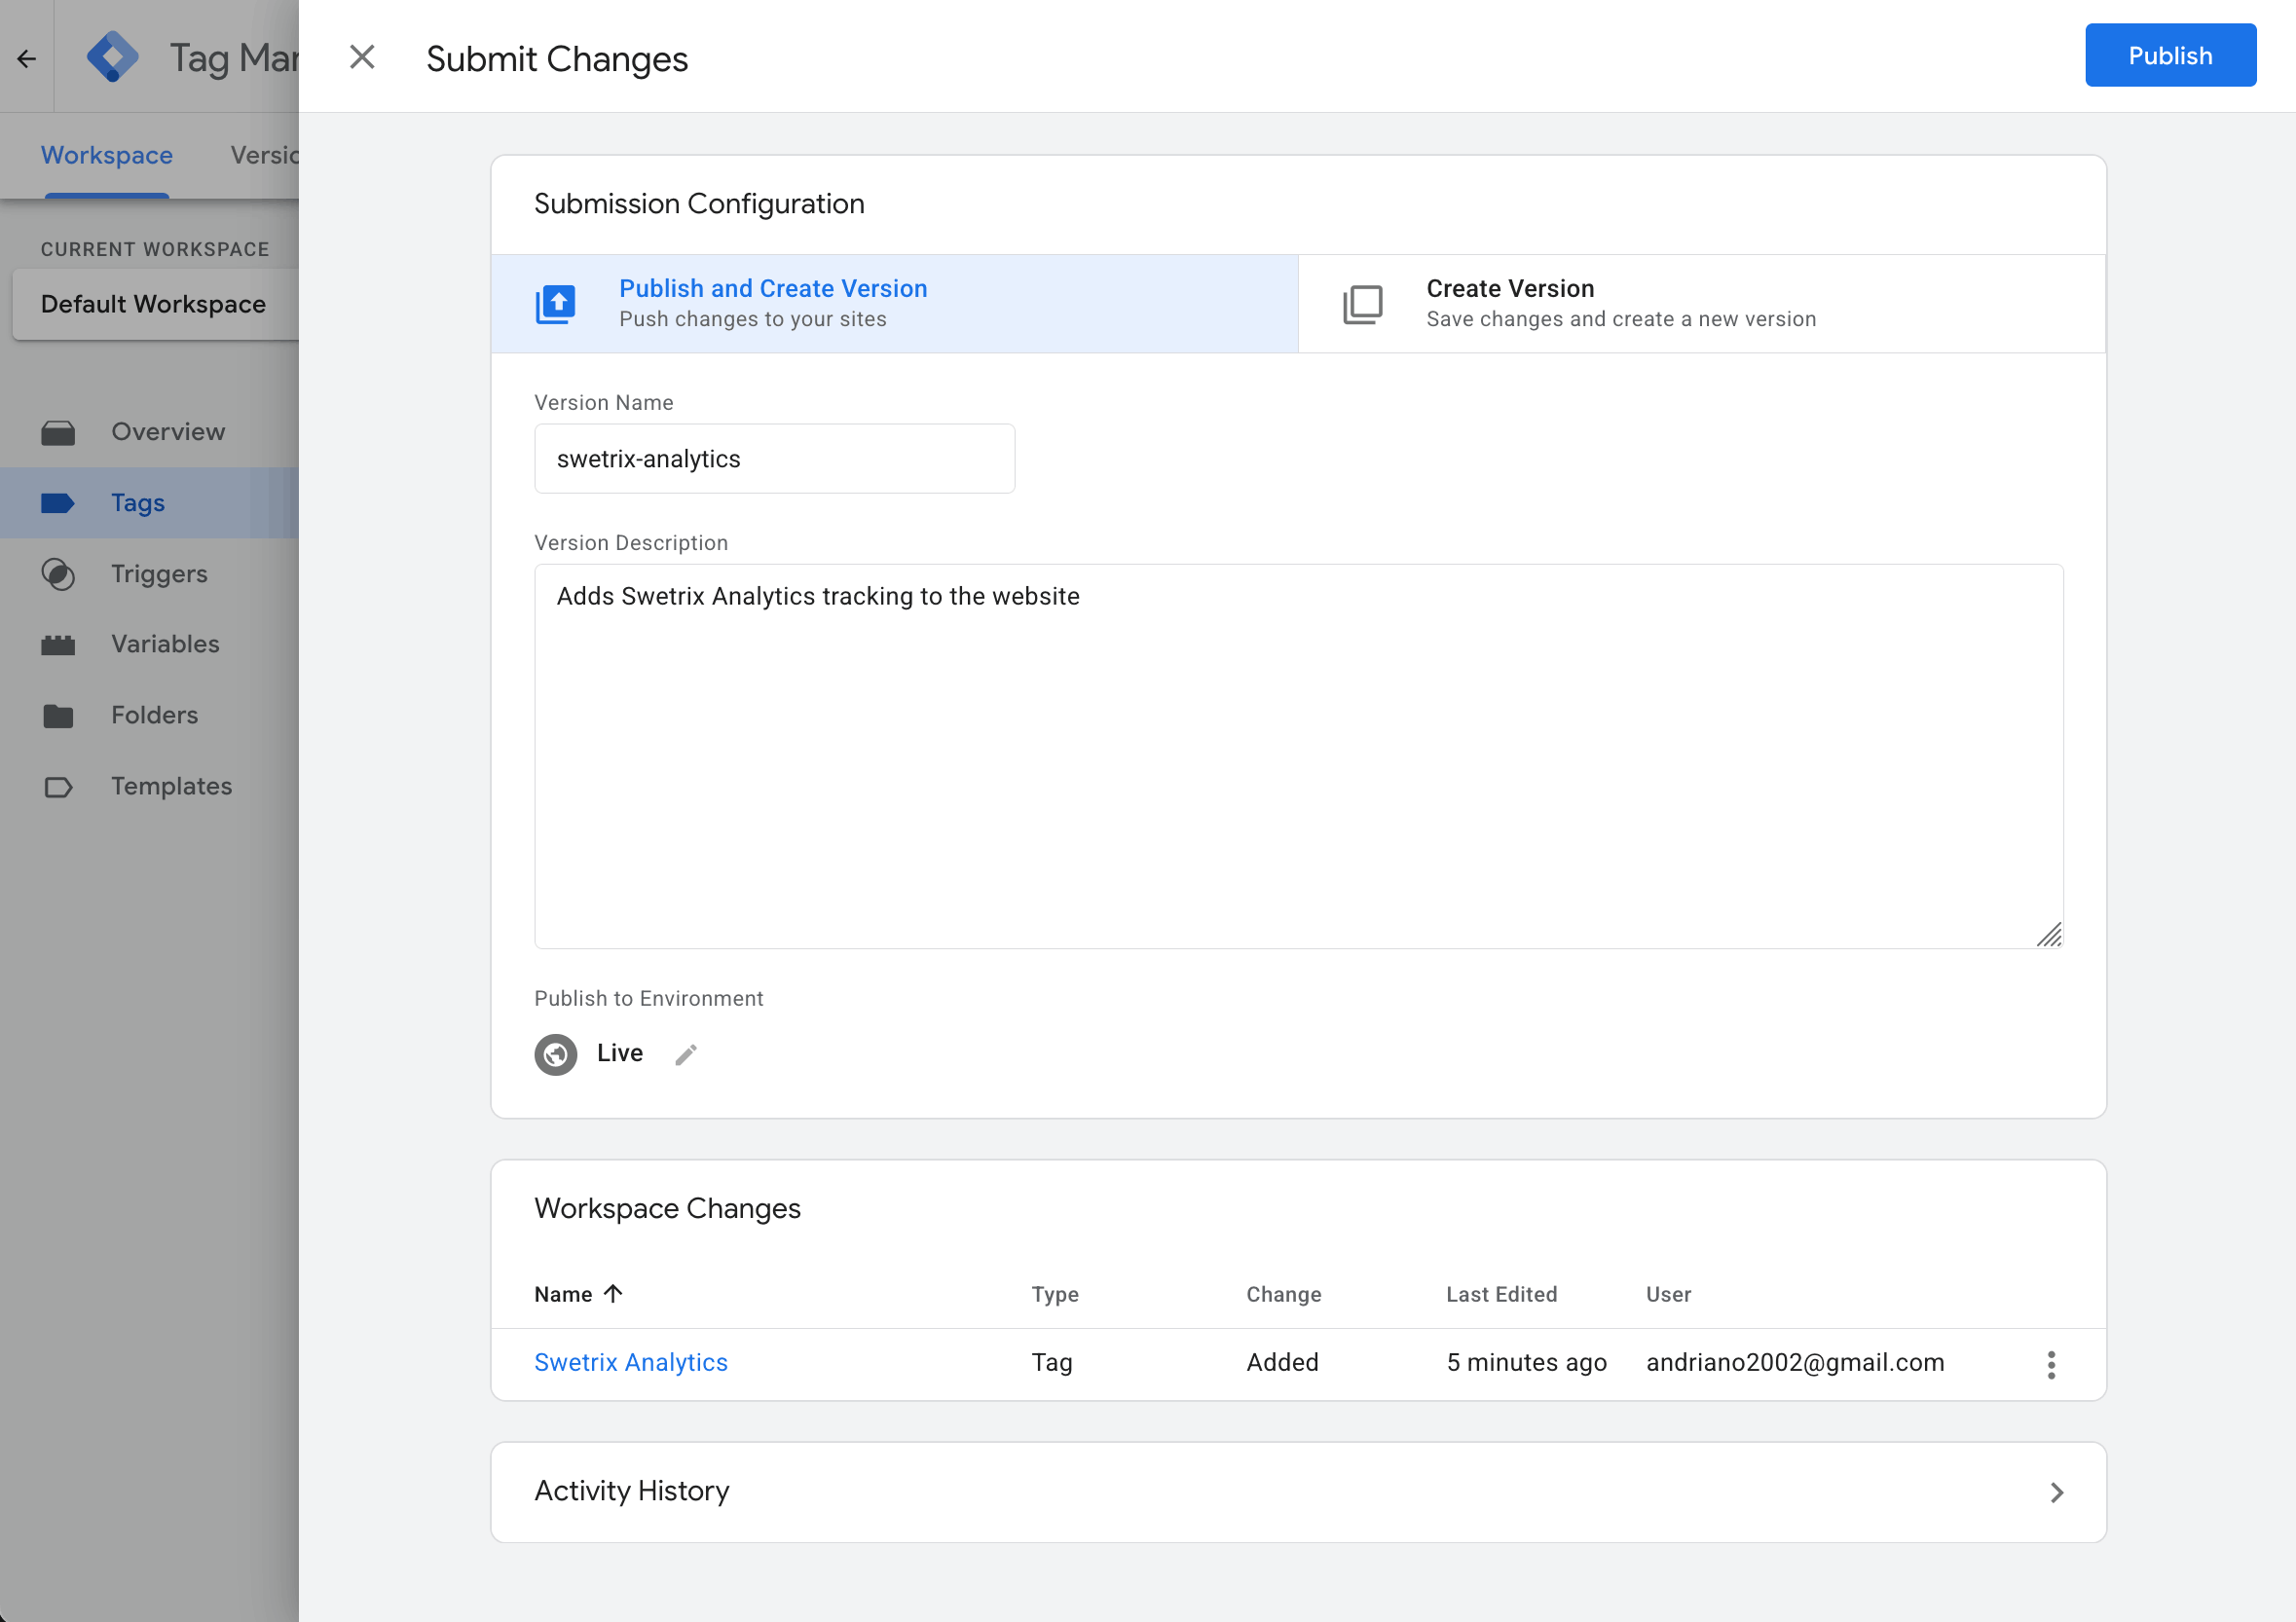
Add a description for your changes in the pop-up window and click Publish.
Check your installation
After publishing, visit your website and browse a few pages. Within a minute you should see new pageviews appearing in your Swetrix dashboard.
If you don't see any pageviews - make sure that your adblocker is not blocking the Google Tag Manager or Swetrix scripts.
Custom event tracking
Once Swetrix is loaded through GTM, you can track custom events using the swetrix.track() function. Refer to the tracking script reference for full API details.
Method 1: Custom HTML tag in GTM
Create an additional Custom HTML tag in GTM and set a trigger for the interaction you want to track (e.g. a click on a specific element, a form submission, or a scroll depth threshold).
<script>
  if (typeof swetrix !== 'undefined') {
    swetrix.track({
      ev: 'signup_cta_clicked',
      meta: {
        page: window.location.pathname
      }
    })
  }
</script>
Method 2: Using GTM built-in variables
GTM provides built-in variables like {{Page URL}}, {{Click Text}}, and {{Referrer}} that you can use directly in your tracking tags. This lets you send contextual data to Swetrix without writing custom selectors.
Create a Custom HTML tag and reference the variables:
<script>
  if (typeof swetrix !== 'undefined') {
    swetrix.track({
      ev: 'element_clicked',
      meta: {
        page: '{{Page URL}}',
        referrer: '{{Referrer}}',
        click_text: '{{Click Text}}',
        click_url: '{{Click URL}}'
      }
    })
  }
</script>
Then attach a trigger for the specific interaction — for example, Click - All Elements filtered to a particular CSS selector.
Method 3: From your website's JavaScript
Since Swetrix is available globally once loaded via GTM, you can also call swetrix.track() directly from your website code:
document.getElementById('cta-button')?.addEventListener('click', function () {
  if (typeof swetrix !== 'undefined') {
    swetrix.track({
      ev: 'cta_clicked',
      meta: {
        button_text: this.textContent,
        page: window.location.pathname
      }
    })
  }
})
Example events
// Form submission
swetrix.track({
  ev: 'form_submitted',
  meta: { form_id: 'contact_form' }
})

// File download
swetrix.track({
  ev: 'file_downloaded',
  meta: { file_name: 'whitepaper.pdf', file_type: 'pdf' }
})

// Video engagement
swetrix.track({
  ev: 'video_played',
  meta: { video_title: 'Product Demo' }
})
Event names must contain only English letters, numbers, underscores, and dots, be under 64 characters, and start with a letter. The meta object supports up to 20 keys with a combined value length under 1000 characters.
Error tracking
You can enable automatic client-side error monitoring by adding swetrix.trackErrors() to your initialisation snippet:
<script>
  (function () {
    var el = document.createElement('script')
    el.src = 'https://swetrix.org/swetrix.js'
    el.onload = function () {
      swetrix.init('YOUR_PROJECT_ID')
      swetrix.trackViews()
      swetrix.trackErrors()
    }
    document.head.appendChild(el)
  })()
</script>
This captures unhandled JavaScript errors and sends them to Swetrix automatically. You can also track errors manually from GTM or your website code:
if (typeof swetrix !== 'undefined') {
  swetrix.trackError({
    name: 'PaymentError',
    message: 'Card declined',
  })
}
Refer to the tracking script reference for configuration options like sampleRate and callback.
Help us improve Swetrix
Was this page helpful to you?