Set up 2-factor authentication (2FA) for your account
Two-factor authentication (2FA) adds a second layer of defense to your account, so even if someone gets hold of your password they still can’t sign in.
Once 2FA is enabled, when you try to log into your account you’ll need:
- Your account password, and
- A one-time verification code generated on a trusted device.
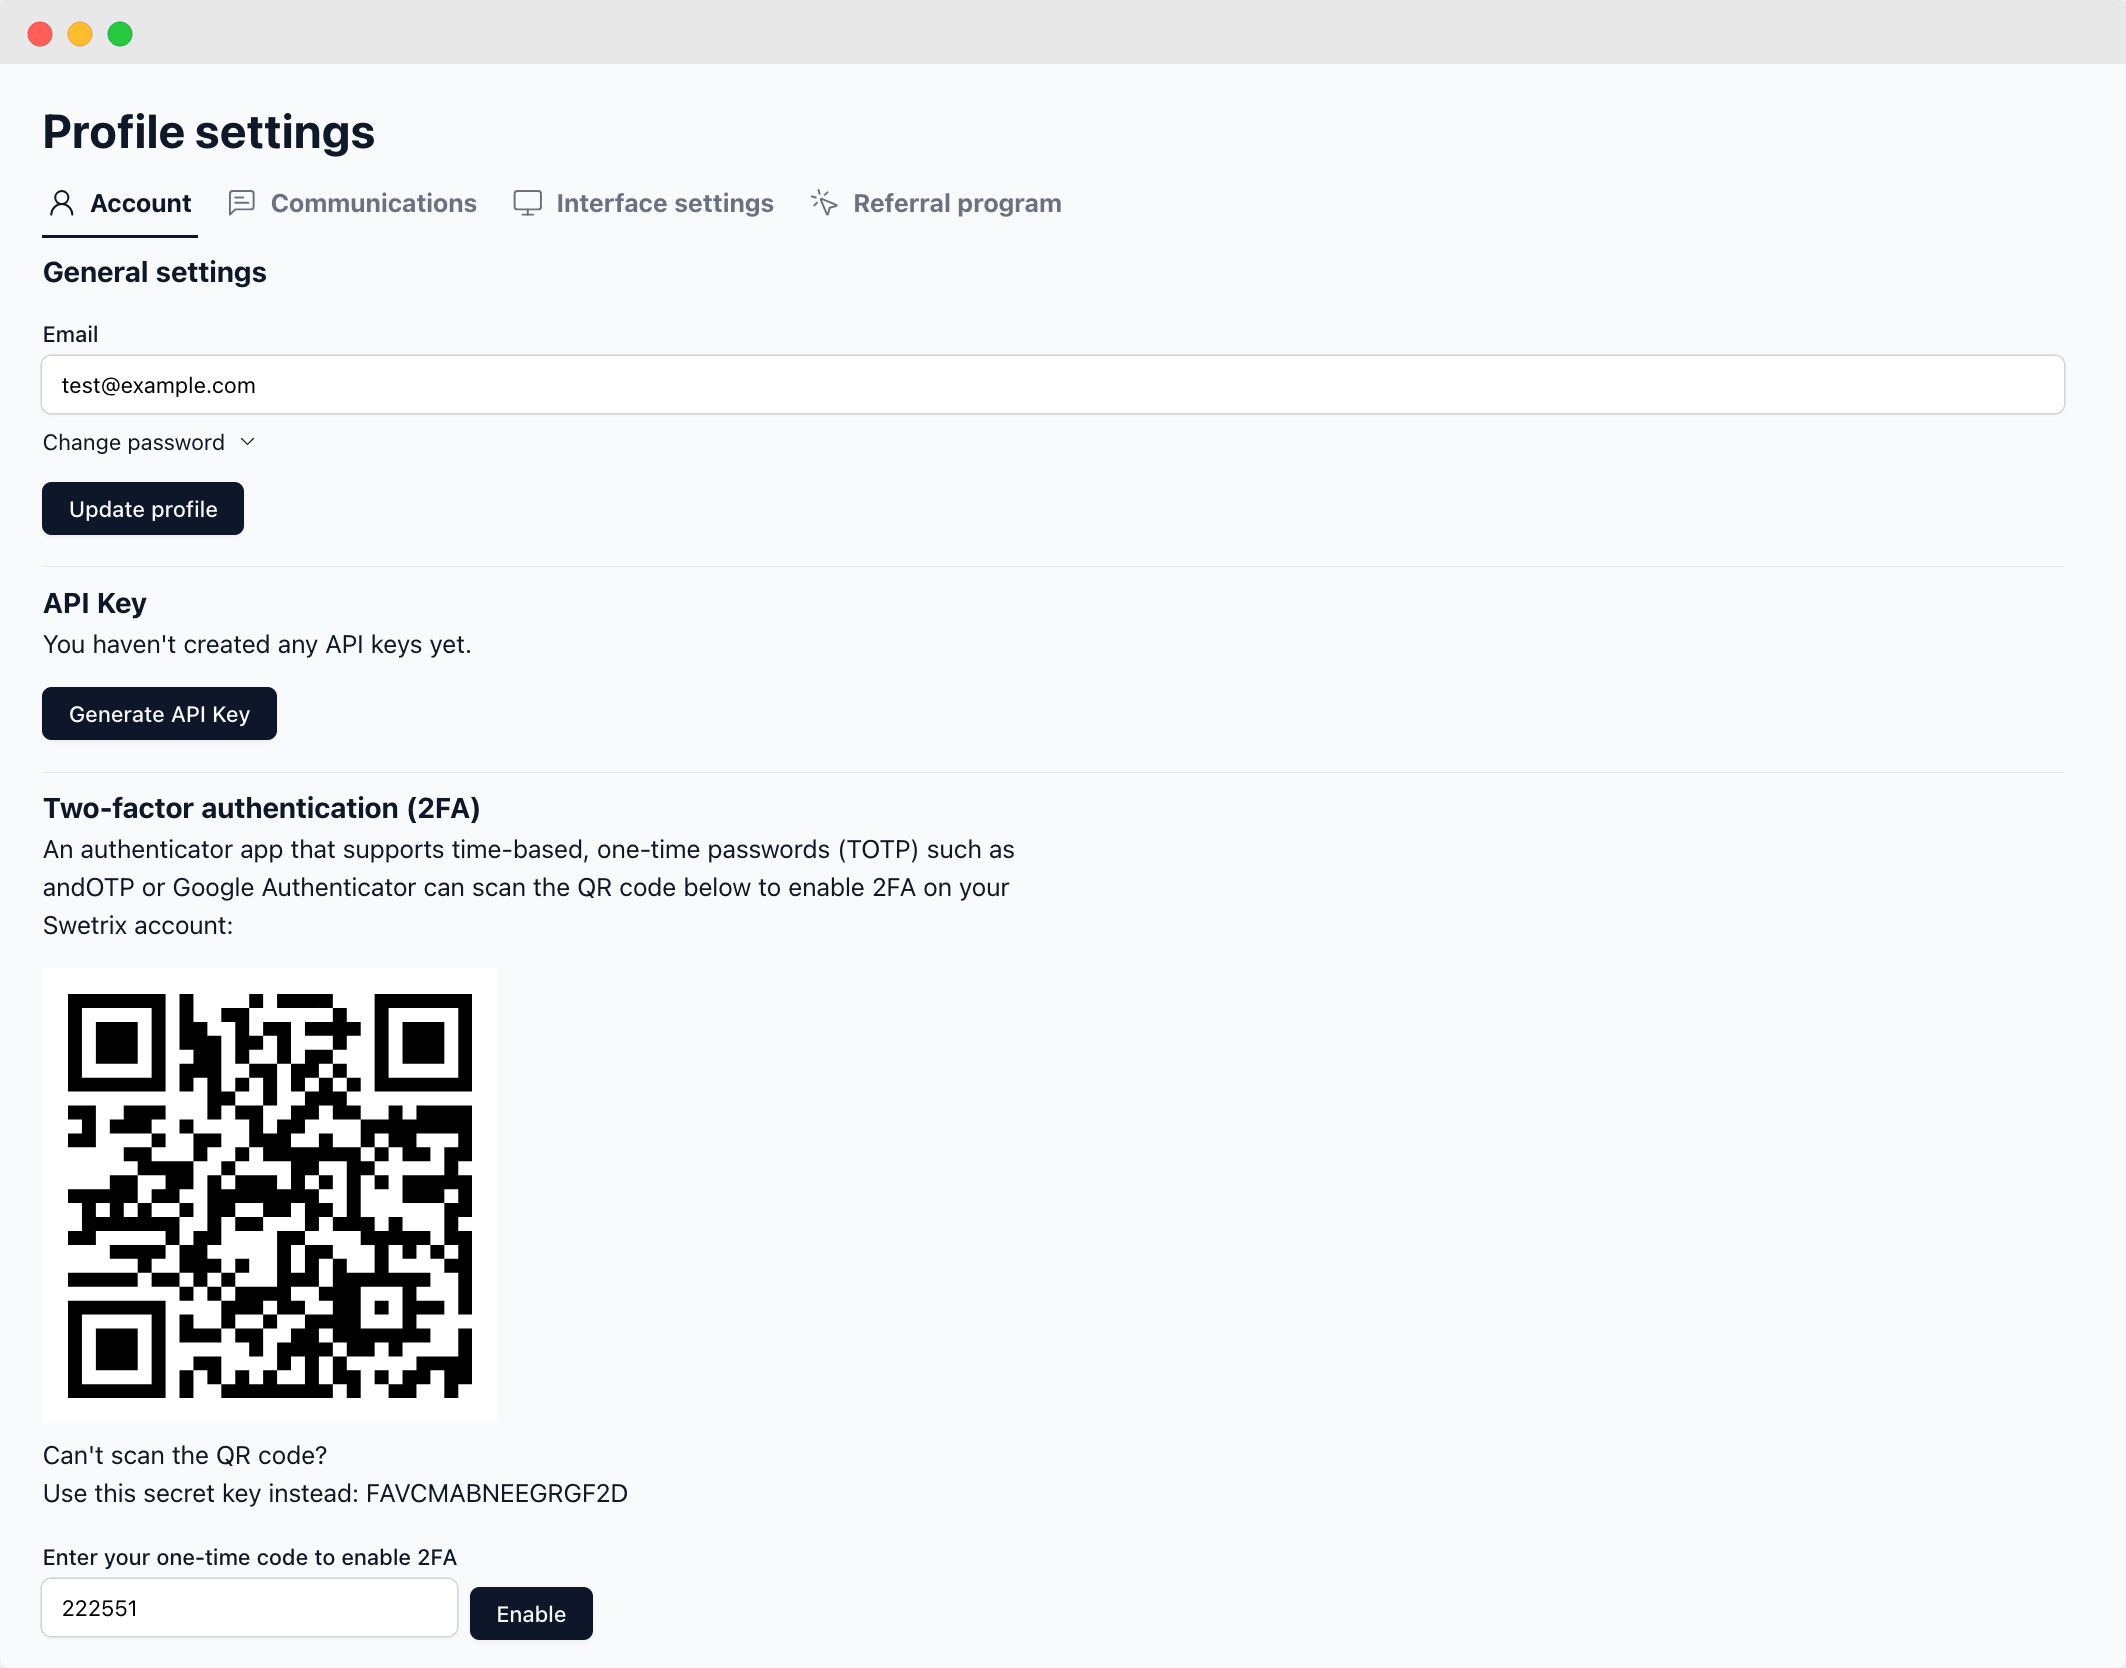
To enable 2FA, you'll need to scan our 2FA QR code with your authenticator app and enter the generated code to Swetrix account settings. Any TOTP generator app works, but we recommend Ente Auth (Android, iOS, Web), Aegis Authenticator (Android) or Bitwarden.
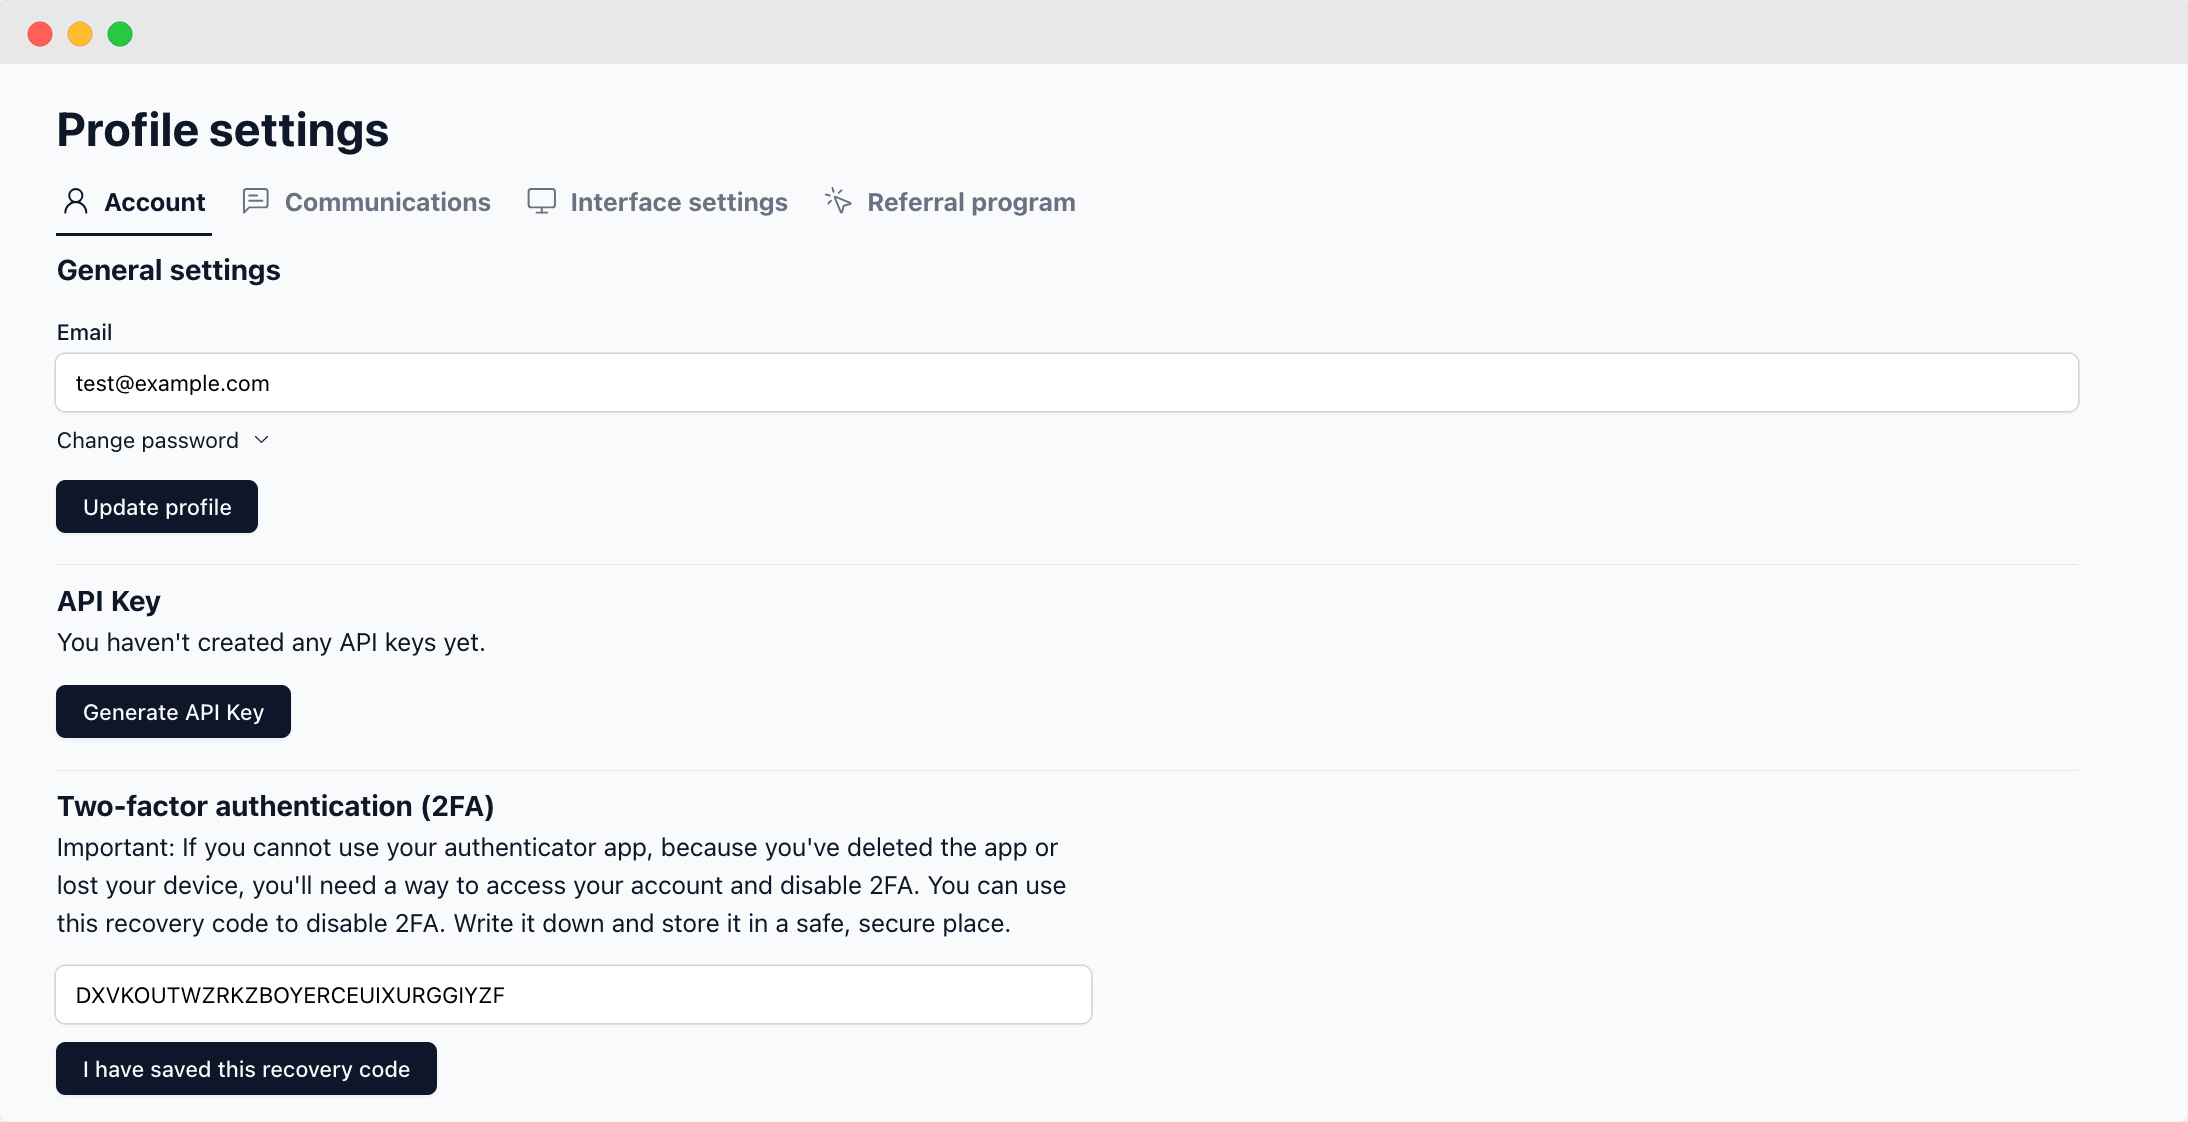
We also provide you with a recovery code that you can enter in case you lose access to your 2FA code generator.
How to enable 2FA
To enable 2FA, you need to log in to your account and go to the account settings page.
On the "Account" tab, you will see the "Two-factor authentication (2FA)" section. Click on the "Enable 2FA" button.
A QR code will appear. Scan it with your authenticator app to link it to your Swetrix account. Alternatively, you can enter the provided secret key into the app instead.
Enter the one-time code generated by your authenticator app and click "Enable" button.
A recovery code will be generated and shown to you. Keep it private and store it somewhere safe. You will need it to access your account or disable 2FA in case you can't provide a one-time code generated by your authenticator app.
How to disable 2FA
To disable 2FA, on the account settings page, scroll down to the "Two-factor authentication (2FA)" section and click on the "Disable 2FA" button.
In the input field shown afterwards, enter a one-time code generated by your authenticator app or a recovery code and click on the "Disable" button.
Once you disable the 2FA, verification codes from the authenticator application and saved recovery codes will become invalid.
Help us improve Swetrix
Was this page helpful to you?